
Before and After: Real Remodeling Transformations
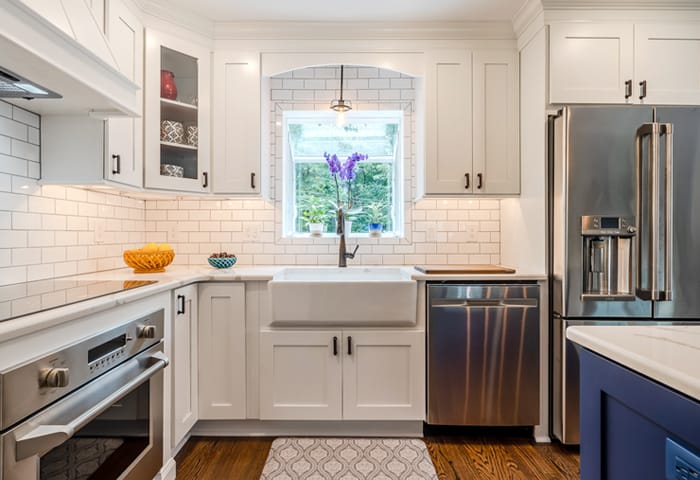
Why before-and-after matters more than just pretty photos
Hi, I’m Matt Morton. Over the last 15 years I’ve seen hundreds of remodels go from worn and awkward to calm, useful, and beautiful. Those dramatic before-and-after photos are great for inspiration, but the real value is the process behind them — planning, decisions, and a few practical steps that prevent heartache and save money.
Start with a thorough "before" checklist
Before demo day, do these things. They take 30–60 minutes and will save weeks of guessing later:
- Photograph everything: Take 8–12 photos from multiple angles. Open cabinets, closets and any problem areas (mold, water stains, cracks).
- Measure and sketch: Measure walls, windows, doors, ceiling heights and fixture locations. Even a simple hand sketch to scale helps your designer avoid costly revisions.
- Make a wish list, then prioritize: Separate must-haves (safety, code, plumbing issues) from want-to-haves (new backsplash, paint color).
- Check mechanicals: Note the age of HVAC, water heater, electrical panel and sump pump. In Chester and Delaware County older homes often have aging systems that are worth addressing during a remodel.
Tip: Take a video walkthrough while narrating issues. It’s faster than writing and captures details you’ll forget later.
Plan the transformation — don’t just pick finishes
A beautiful finish can’t fix a bad layout. When I consult with homeowners in Chester County or Delaware County I focus first on function: circulation, storage, natural light and how the family moves through the space. Here are practical layout tips by room:
Kitchens
- Keep the basic work triangle in mind — stove, sink, fridge — but think in work zones: prep, cooking, and cleanup.
- Invest in drawers for lower cabinets (full-extension) and soft-close hinges; they change daily life more than a premium countertop.
- Choose durable, low-maintenance finishes: quartz counters, porcelain tile floors, and semi-custom cabinets if you want long-term value without boutique pricing.
Bathrooms
- Prioritize proper ventilation and waterproofing. In my experience, bad ventilation is the root cause of most bathroom failures in older PA homes.
- Use proper substrates: cement board or appropriate backer for tile, and a waterproof membrane in wet areas.
- Consider a curbless shower if you plan for aging-in-place — it’s a practical upgrade that adds resale value locally.
Basements
- Moisture control first: check exterior grading, gutters, and the sump pump. Many basements in our area require attention to groundwater before finishing.
- Egress: if you’re creating a bedroom or living area, plan egress windows early — they affect excavation and scheduling.
- Ceiling choice: exposed joists with painted finishes save height; drop tiles give access but reduce headroom.
How timelines really work
One of the biggest surprises homeowners face is timeline drift. A realistic approach balances speed with the need for inspections and lead times:
- Design & permit phase: 2–6 weeks, longer if you need extensive structural work or historic approvals in Chester County townships.
- Demolition & rough-ins (plumbing, electrical, HVAC): 1–3 weeks depending on scope.
- Inspections, then finishes: 2–6 weeks. Material lead times (tiles, cabinets) can add time — always confirm availability before finalizing design.
Budgeting and handling surprises
Always set aside a contingency. I advise clients to reserve 10–20% of the total remodel budget for unexpected issues — rotten joists, hidden mold, or antiquated wiring are common in older homes here. If nothing shows up, that contingency becomes upgrades you’ll love.
Living through a remodel
Want to keep your kitchen functional during a remodel? Plan a temporary setup: small refrigerator, microwave, and designated prep surface. For longer projects, consider staying elsewhere for intensive demo and rough-in phases. If you must stay, ask your contractor about dust control, phased work, and daily cleanup routines.
The "after": maintenance and enjoying the results
The transformation isn’t finished when the paint dries. Here’s what I do with homeowners after project completion:
- Review warranty and maintenance items: register appliances, learn filter schedules, and get written care instructions for stone and tile.
- Keep a touch-up kit: paint, grout, and caulk saved in a labeled bag for quick fixes.
- Document the new systems: take final photos, note locations of shut-offs and access panels, and store them with your home records.
Local specifics: what I see in Chester and Delaware County
Homes here carry a lot of history. That charm comes with unique challenges: plaster walls, old plumbing, stone foundations and, in lower-lying parts of Delaware County, higher water tables. When I work on local projects with Craftsworth Construction I plan for these realities early — it keeps budgets accurate and avoids surprises that can stall a job.
If you’re considering a remodel, start with a clear before assessment, a prioritized wish list, and a contingency fund. Whether it’s a kitchen that finally works for weekday life or a basement turned into a family room, the best before-and-after transformations come from thoughtful decisions, not just pretty finishes. If you want to talk through an idea for your Chester or Delaware County home, I’m happy to help—this is the part of the job I enjoy most.
— Matt Morton, Craftsworth Construction