What to Expect During a Basement Remodel: A Complete Timeline
Finishing your basement is one of the highest-return investments you can make in your home — adding living space, storage, and real value all at once. But for most homeowners, it's also unfamiliar territory. What actually happens between that first conversation and the day you're pouring drinks at your new bar or watching the Eagles in your game room?
At Craftsworth Construction, we've completed basement remodels ranging from modest utility spaces to full-scale entertainment suites all across Chester County and the surrounding communities. Over the years we've developed a process that's thorough, transparent, and designed to eliminate surprises. Here's exactly what that process looks like — phase by phase.
Phase 1: The Initial Consultation
Every project starts the same way: we come to you.
During our first visit, we walk the entire basement with you — listening carefully to your vision and taking detailed notes on what you want to include. A home gym? A full bathroom? A wet bar with seating? A home office? A game room? A theater? There's almost nothing we haven't built, and we want to understand exactly what you're after before we put pencil to paper.
At the same time, we're conducting a thorough assessment of the existing conditions. That means closely examining all existing plumbing, mechanicals, electrical panels, ductwork, support columns, beams, and the foundation itself. We take detailed measurements of the entire space and document everything with notes and photos. What we find during this walkthrough directly shapes how we design and price your project.
A note on existing finished basements: If your basement has already been finished at some point, we often recommend completing a full demolition before the design phase. This lets us see what's actually behind the walls and above the ceilings — existing conditions that can significantly affect the plan. It's a step that prevents surprises and costly rework later.
Phase 2: Waterproofing Assessment
Before any design work begins, we address the single most important question: does this basement have a water issue?
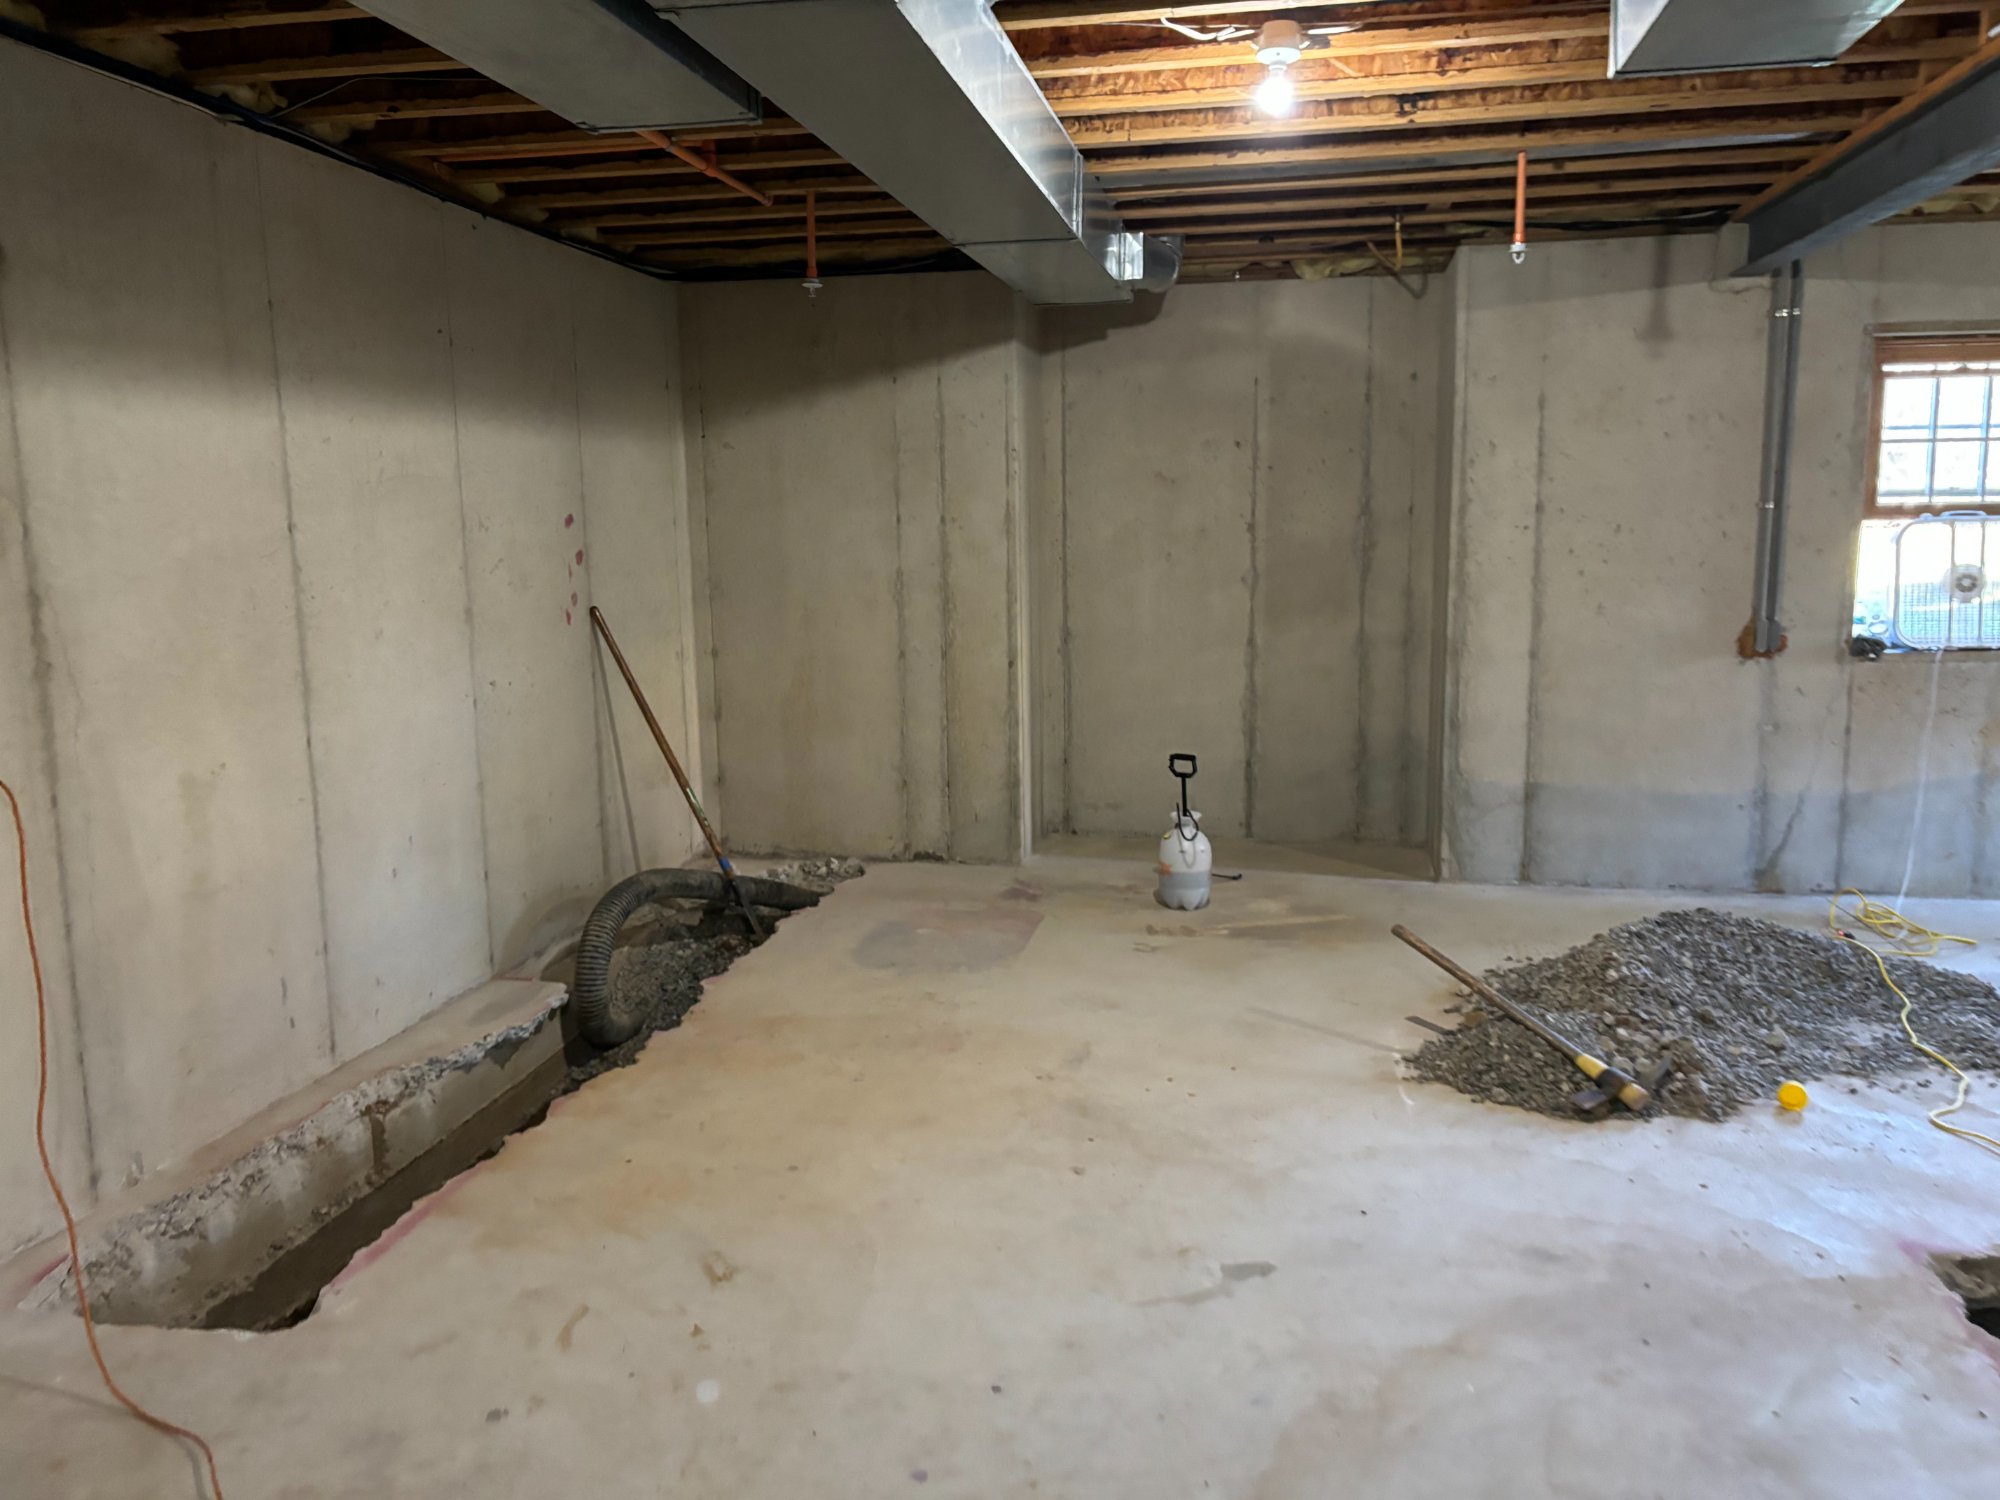
Interior perimeter french drain installation in progress — water management always comes before framing
Water infiltration is the enemy of any finished basement. Finishing over a moisture problem doesn't make it go away — it makes it significantly worse, and far more expensive to fix later. That's why our very first technical evaluation is a careful look at the foundation, the existing drainage situation, and any signs of past or present water intrusion.
The good news: the majority of the basements we work in don't require any waterproofing at all. But when it's needed, it must be done right — and we address it before a single wall goes up.
Depending on the foundation type, the severity of the issue, and what's already in place, waterproofing solutions may include:
- French drain systems — interior perimeter drainage channels that collect and redirect water to a sump pump
- Dimple board or drain board — a membrane installed against the foundation wall that creates a drainage gap and path for water to travel harmlessly to the drain system
- Sump pump installation or upgrade — a properly sized and positioned sump system is essential whenever active water management is required
One thing we're direct with homeowners about: waterproofing paint is not a waterproofing solution. It can reduce moisture vapor that naturally wicks through masonry — but only with proper surface preparation, and only for vapor, not actual water infiltration. If there's a drainage issue, it requires a drainage solution.
Phase 3: Design, Floor Plan & Estimate
Back at our office, we get to work on a detailed floor plan of the proposed finished space. This isn't a rough sketch — it's a scaled drawing that accounts for every existing obstruction, mechanical, and structural element in your basement, and lays out your new walls, rooms, and features within that reality.
For projects that include a kitchen area, wet bar, or built-in cabinetry, we also produce 3D renderings of those spaces so you can visualize the finished product before a single board is cut. This step has real value — it's how we catch design decisions that look good on paper but don't translate well in three dimensions.
The floor plan is accompanied by our detailed written estimate. We go through everything together so you understand exactly what's included and how it's priced.
From here, it's common for a project to go through multiple rounds of revisions. Maybe the bar moves, the bathroom gets bigger, or you decide to add a bedroom. That back-and-forth is completely normal and expected — we'd rather get the design exactly right before we break ground than make changes after framing is up.
Phase 4: Contract, Scheduling & Product Selection
Once you've decided to move forward, we execute our contract and get you onto our production schedule. We'll also begin working through product selections — flooring material and color, tile, plumbing fixtures, trim profiles, paint colors, lighting — so that materials are specified and ordered well before they're needed on the job.
Simultaneously, we begin the permitting process. Basement finishing in Chester County and throughout Pennsylvania requires permits for framing, electrical, plumbing, and mechanical work. We handle all of it — the preparation, submission, and coordination with the municipality. You don't have to navigate that yourself.
Phase 5: Framing
With permits in hand and materials on order, the physical transformation begins.
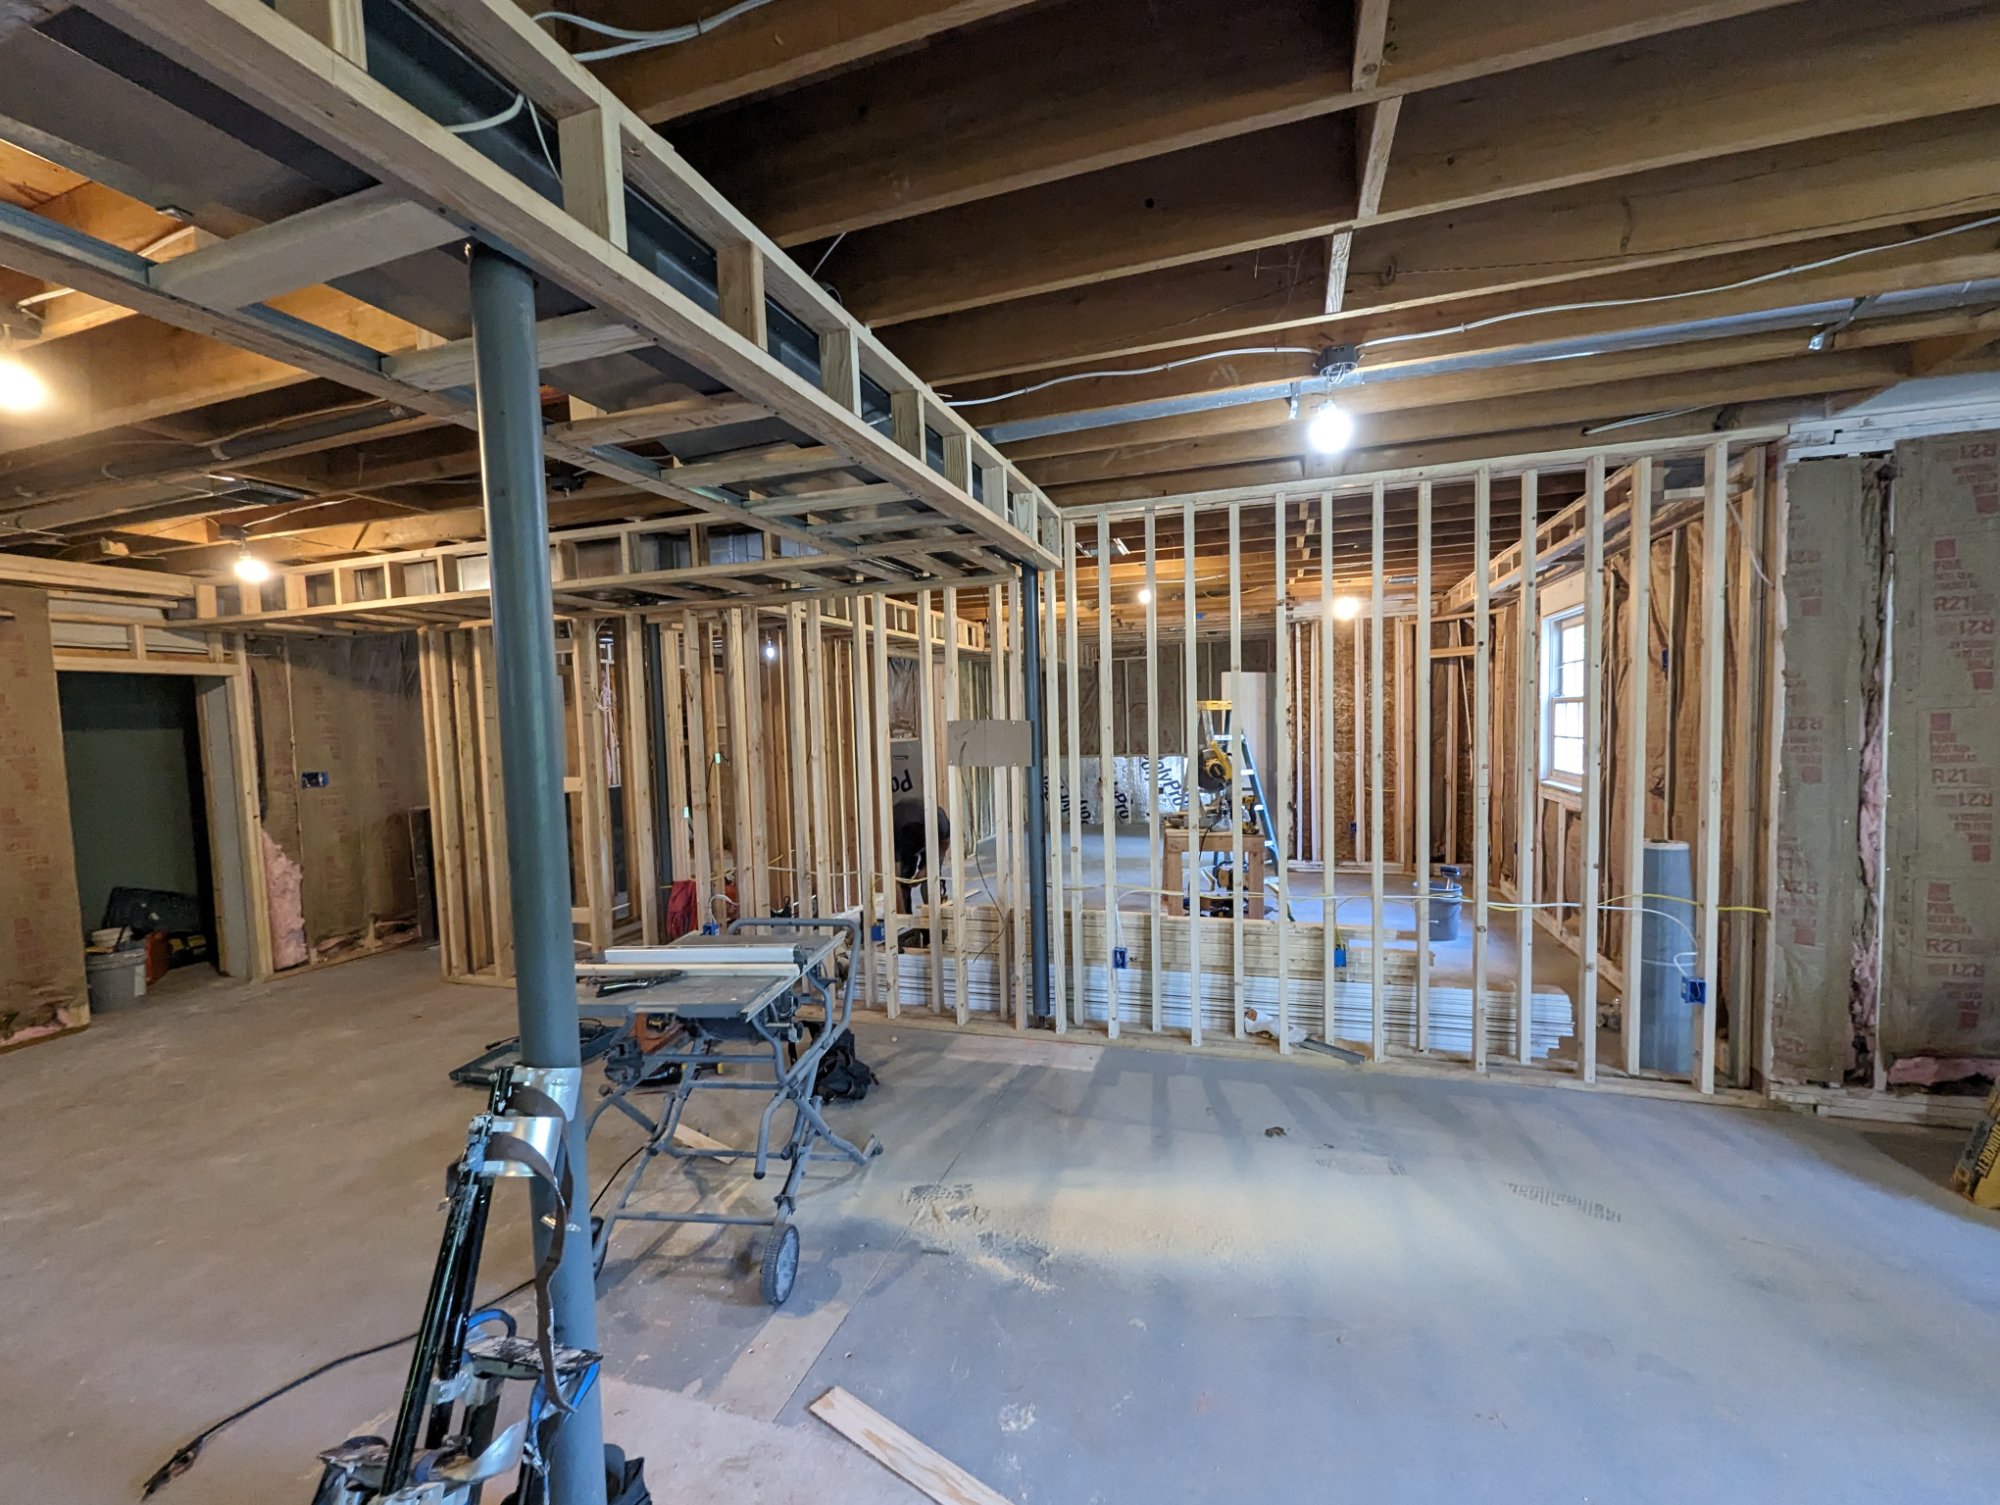
Framing underway — 2x4 walls with pressure-treated bottom plates, soffit framing around a steel beam, insulation staged
We frame all new partition walls using 2x4 wood construction with pressure-treated bottom plates at the floor — a code requirement that protects framing lumber from moisture contact with the concrete slab beneath. All walls are plumb, square, and built to last.
Where the ceiling has obstructions — steel I-beams, HVAC trunks, plumbing waste lines — we build out custom soffits to conceal them cleanly. A well-designed and well-built soffit turns what would otherwise be an eyesore into an architectural detail. On the Griffith Lane project, for example, the structural steel beam became the anchoring feature of the bar design — wrapped in a rustic wood beam casing that defined the entire room.
Phase 6: Plumbing & Electrical Rough-In
Once framing is complete, the licensed trades come in to rough in their systems.
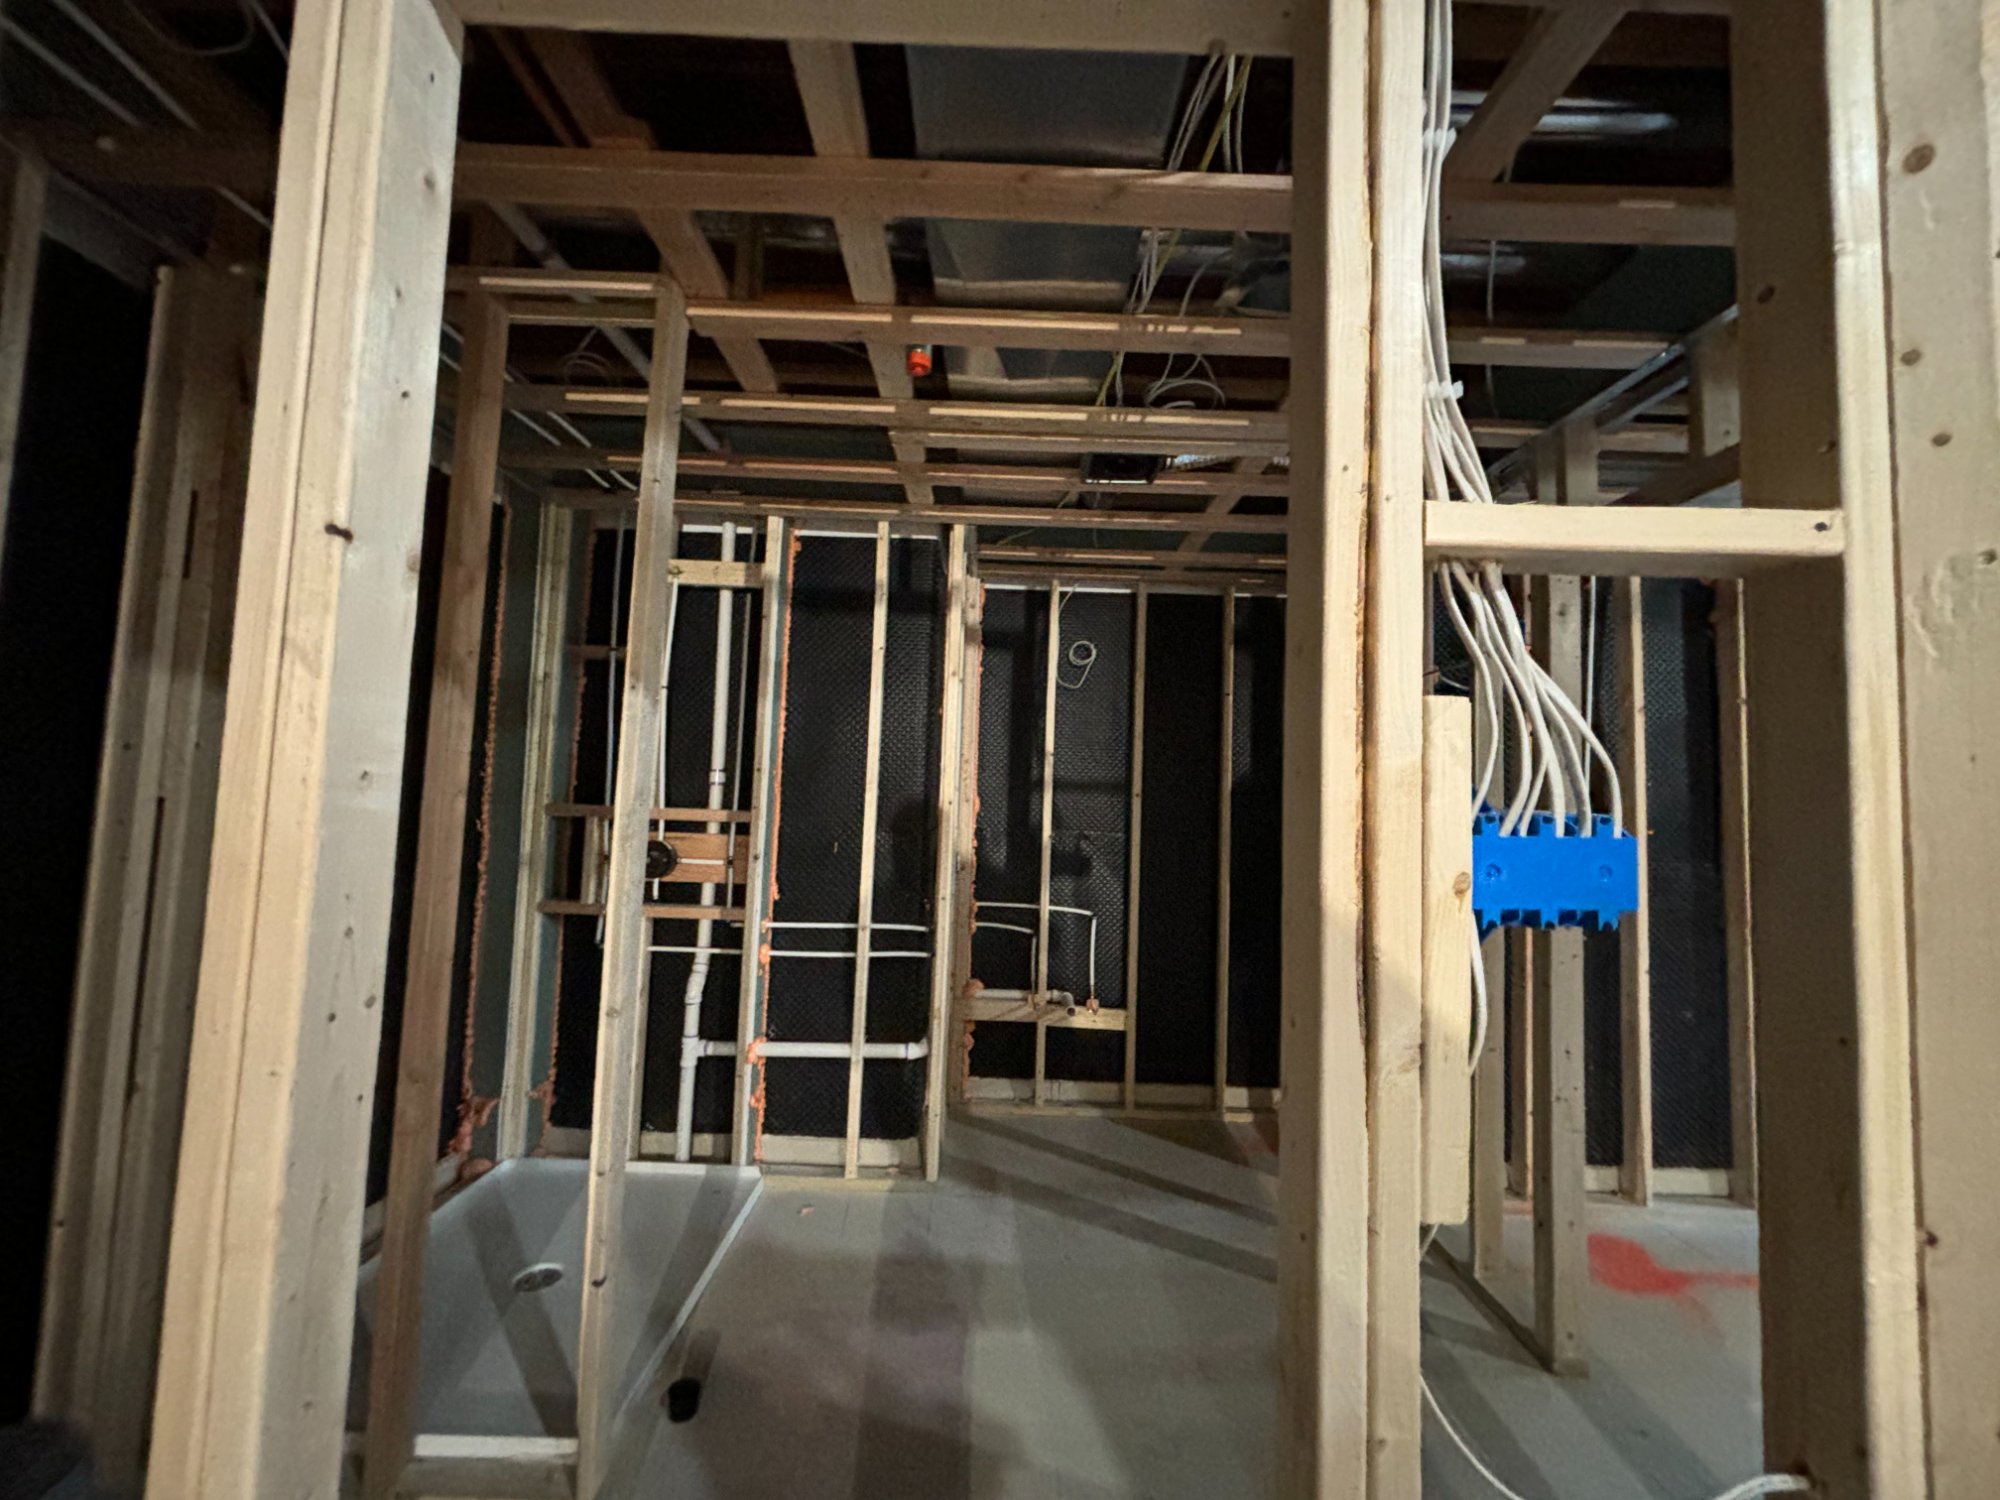
Plumbing and electrical rough-in inside framed bathroom walls — supply lines, drain lines, and electrical boxes in place
Plumbing rough-in includes all supply and drain lines for bathrooms, wet bars, and kitchenettes. Depending on the layout and the location of existing plumbing, this may involve cutting into the concrete slab to route drain lines — a significant but often necessary step for adding a bathroom or bar sink below grade.
Electrical rough-in covers all new wiring for outlets, switches, lighting circuits, dedicated appliance circuits (bar refrigerators, microwaves), HVAC controls, and low-voltage runs for in-ceiling speakers, data, and television. We also evaluate the main panel at this stage — if the existing service doesn't have capacity for the new circuits, a sub-panel or panel upgrade may be required.
After rough-in is complete, we schedule the required municipal inspections before anything gets covered up. These inspections exist to protect you, and we don't move forward until everything passes.
Phase 7: Insulation
With all systems roughed in and inspected, we insulate.
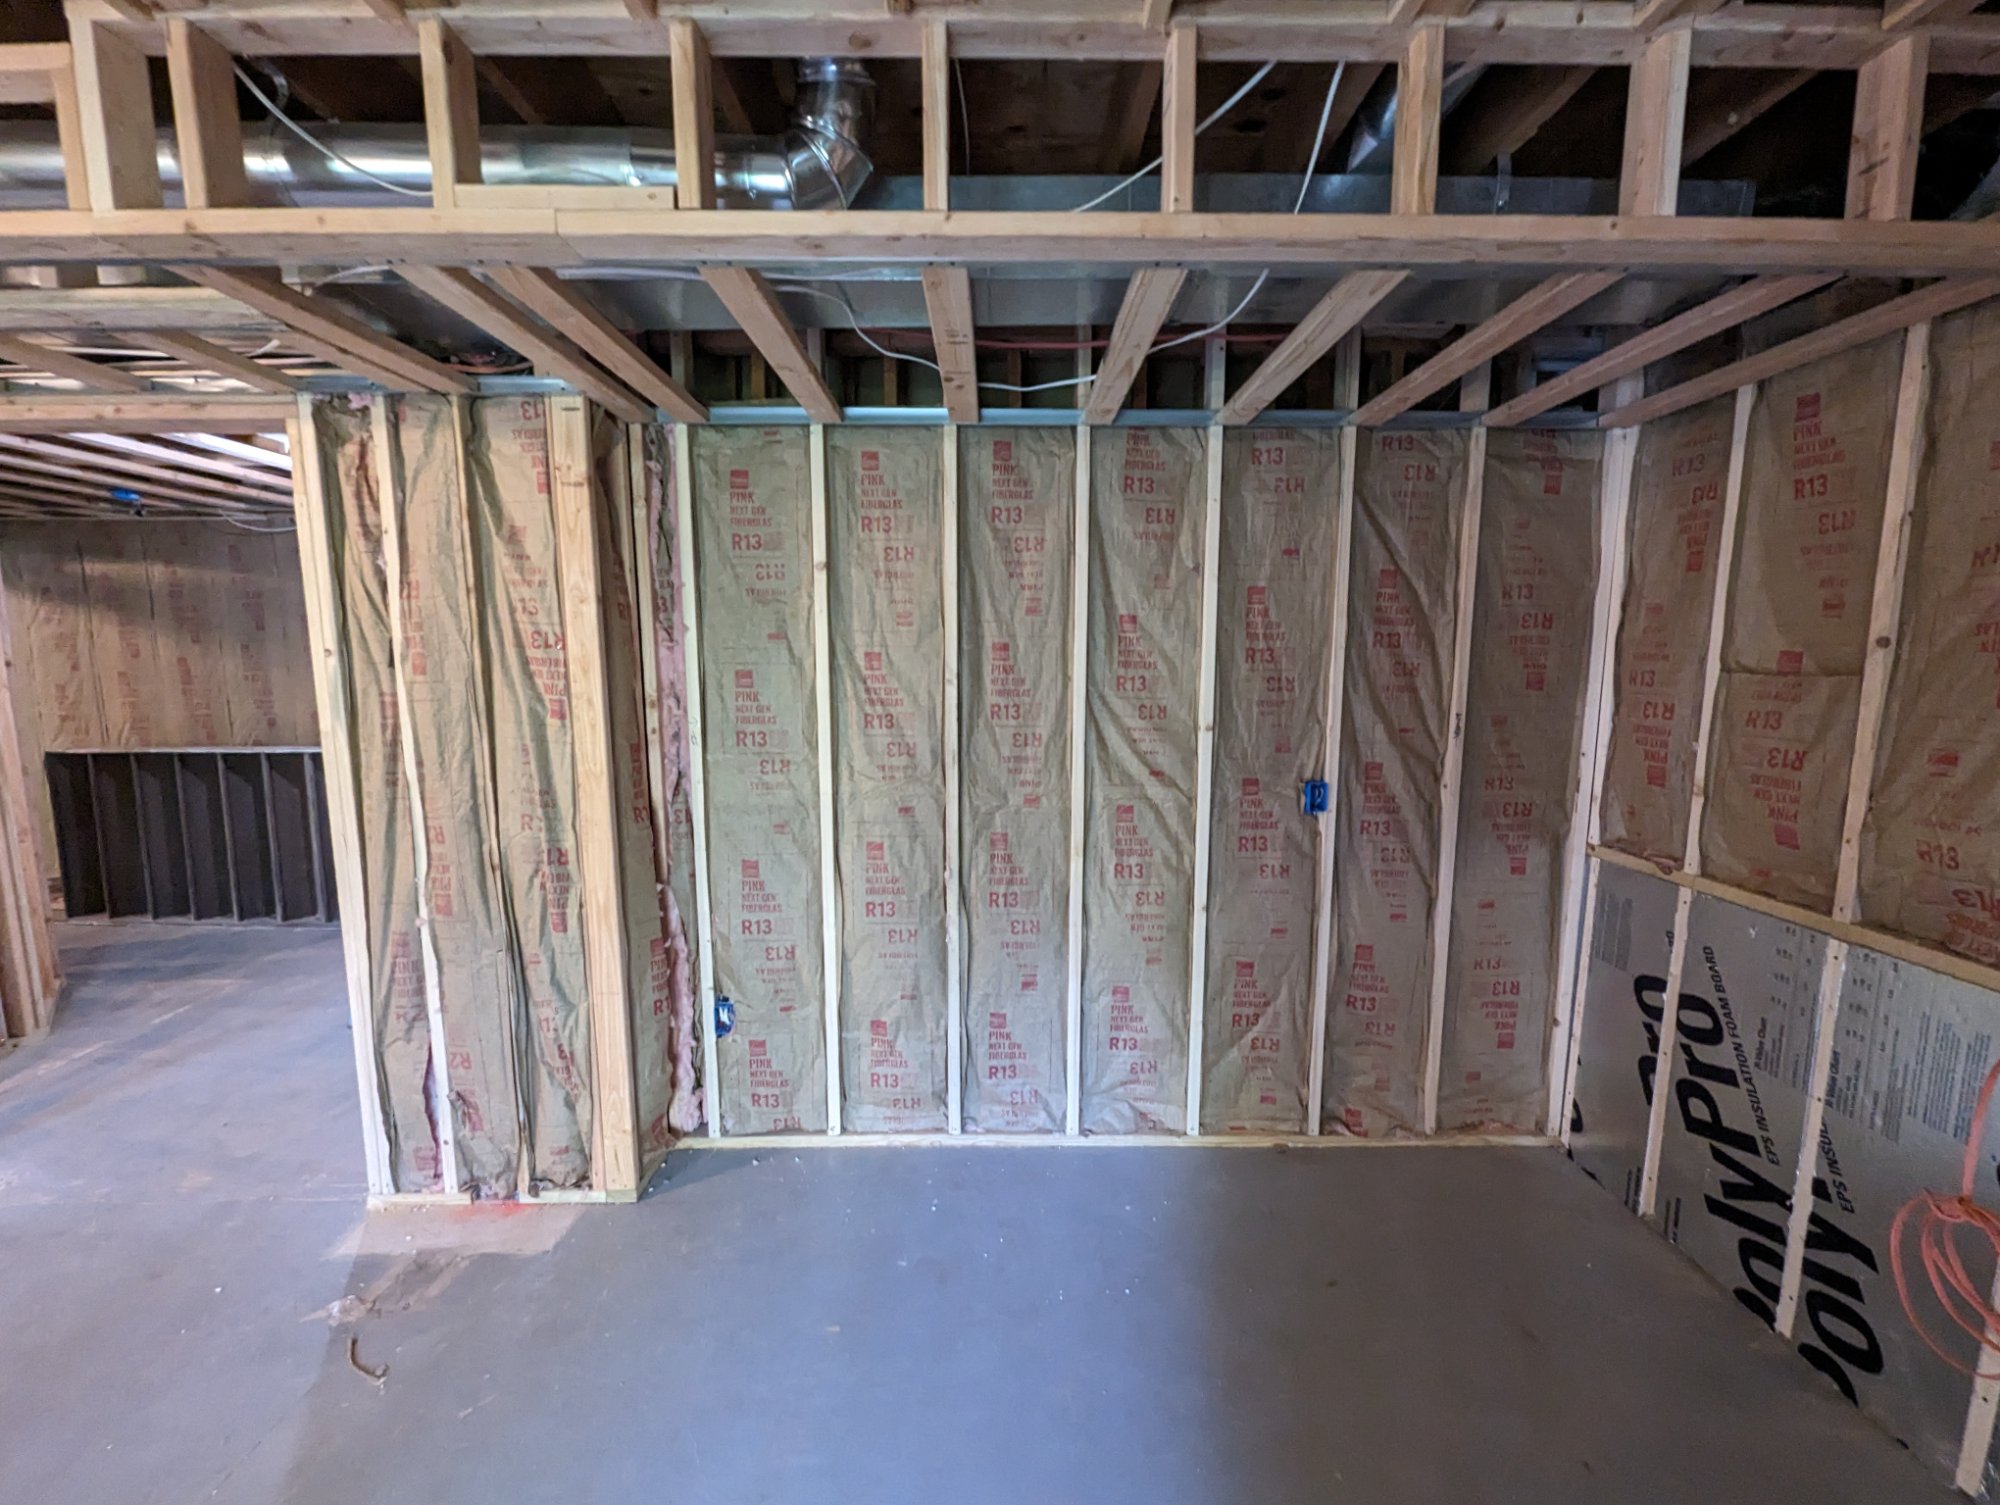
R-13 faced fiberglass batt insulation in exterior wall cavities — thermal and sound performance
Exterior foundation walls receive R-13 fiberglass batt insulation with a kraft paper vapor barrier, meeting code requirements for thermal performance. Interior partition walls between rooms — especially around bathrooms, bedrooms, and media rooms — receive insulation as well for sound isolation. This is a detail that makes a real difference in the finished space. Nobody wants to hear the treadmill from the media room.
Phase 8: Drywall
Drywall goes up across all walls and ceilings, then it's finished to a smooth, paint-ready surface. We complete all taping, mudding, and finish sanding in-house. Corners are crisp, seams disappear, and nothing gets painted over that isn't ready.
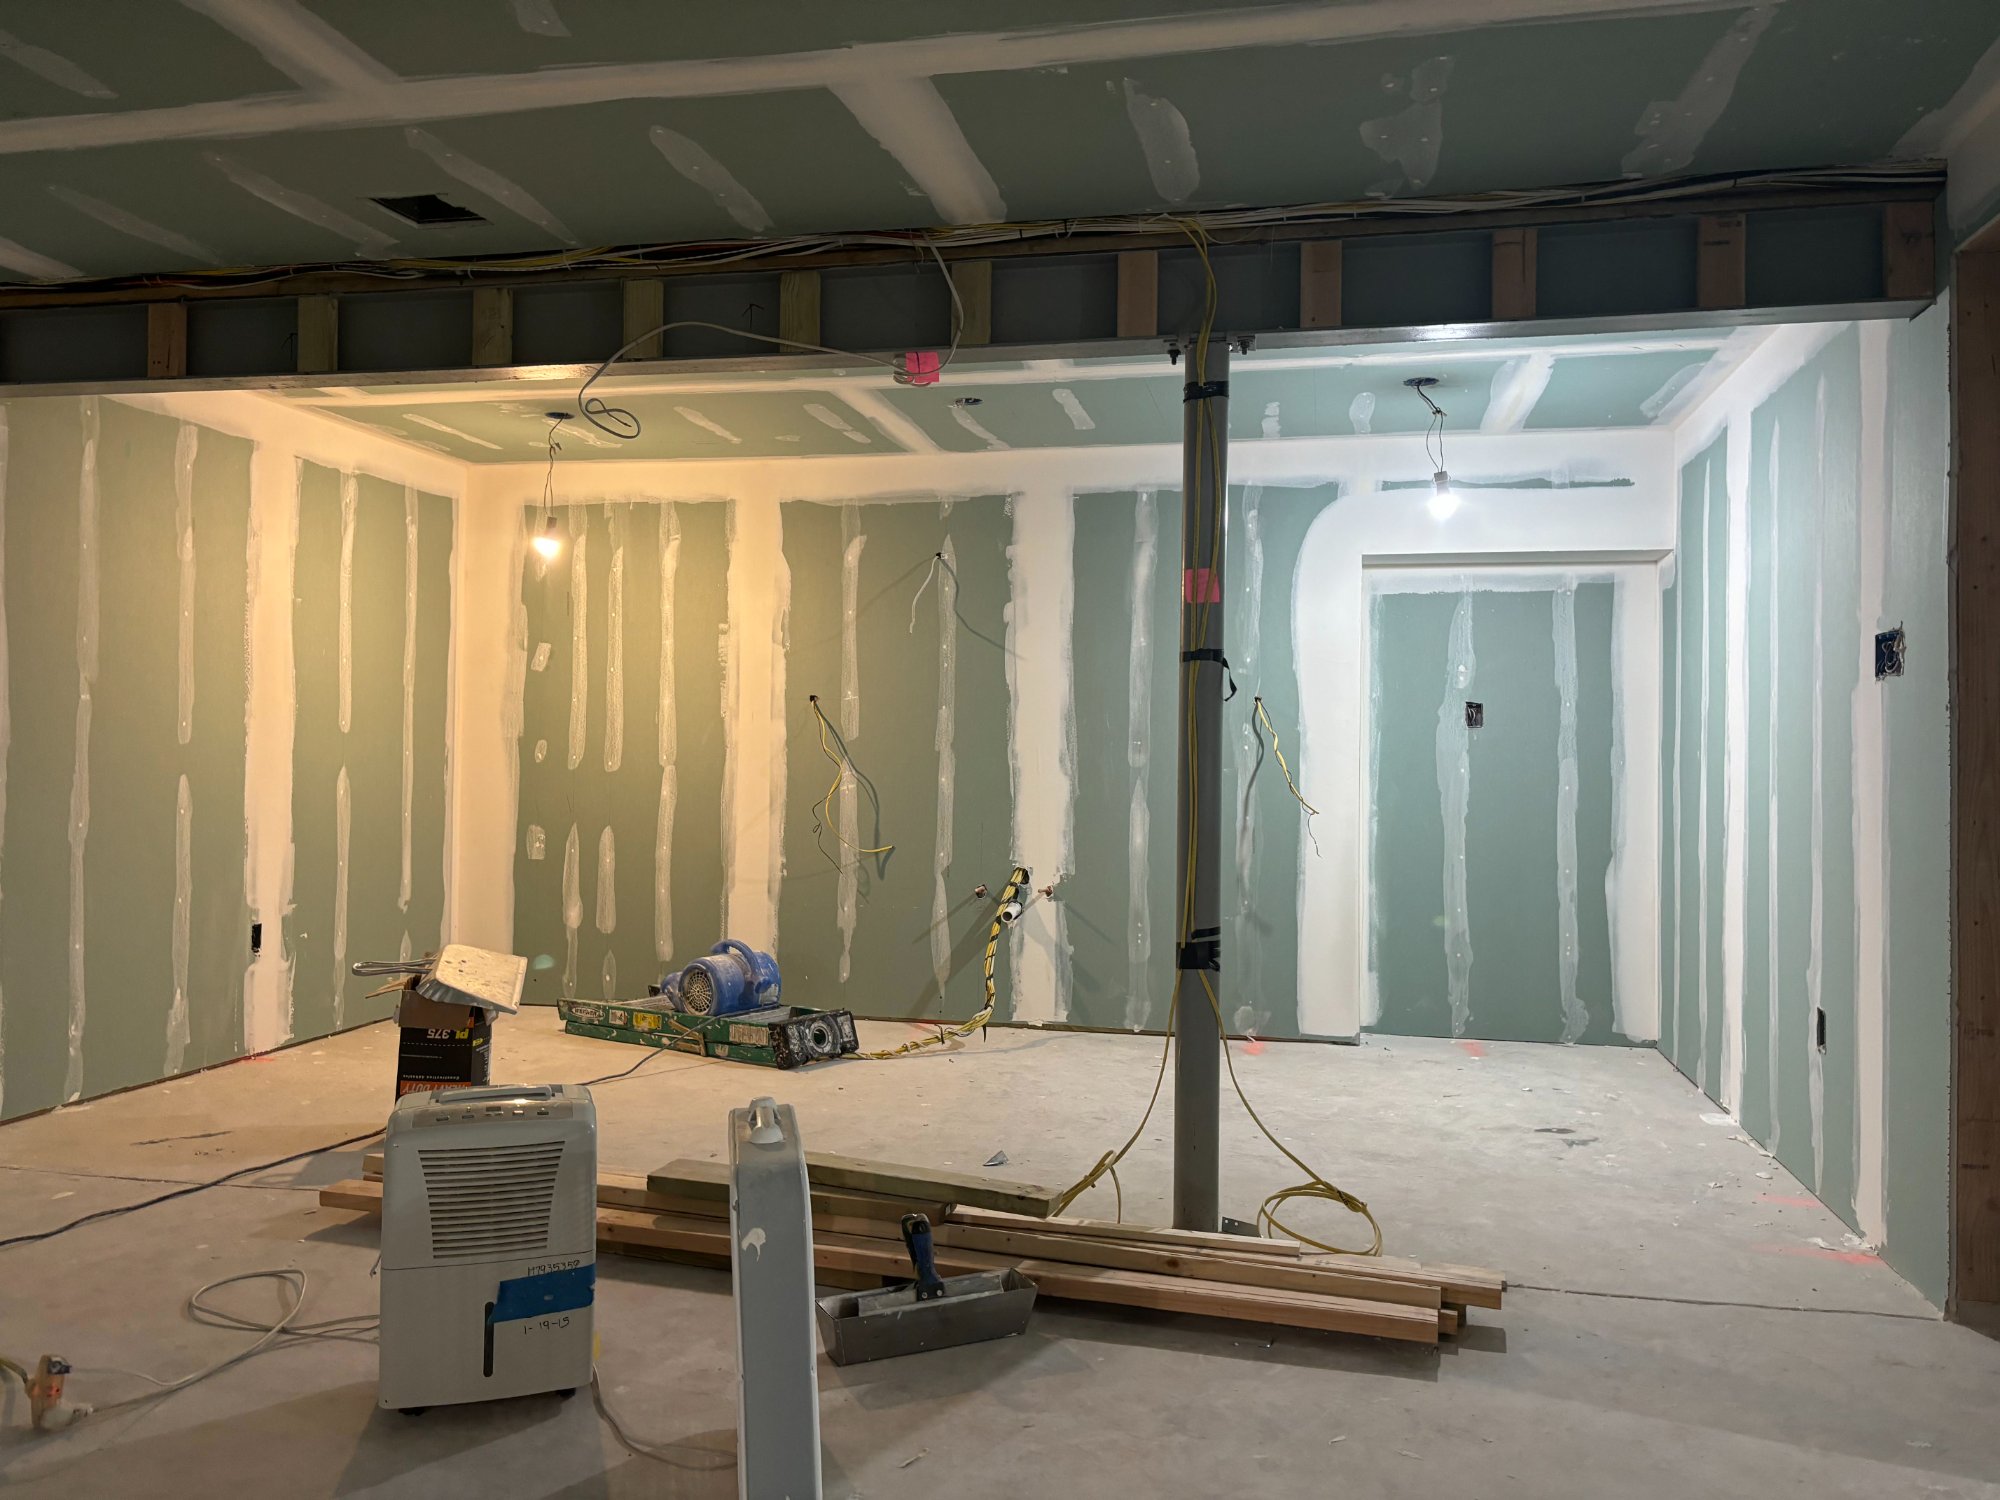
Drywall hung and joint compound applied — the space starts to feel like finished rooms
In wet areas like bathrooms or behind bar sinks, moisture-resistant drywall (greenboard) or cement board is used as appropriate for the application.
Phase 9: Trim, Paint & Flooring
This is the phase where the space really comes to life.
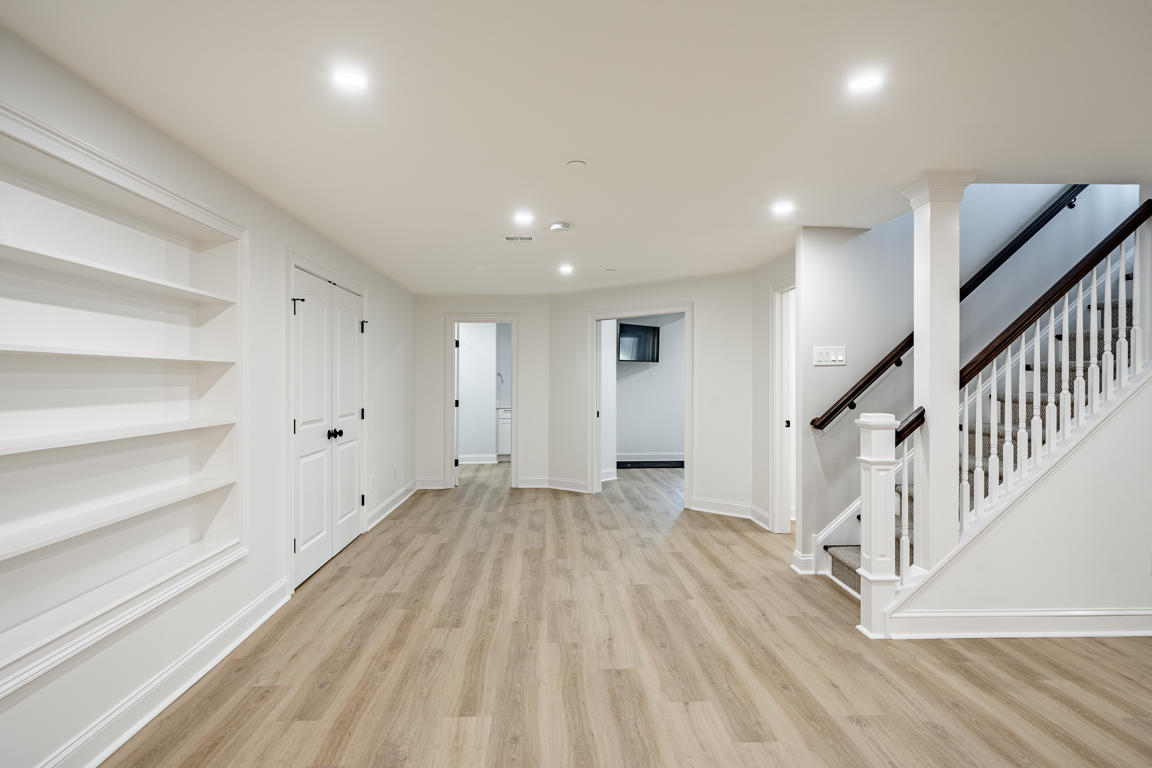
Plymouth Road project — LVP flooring, custom built-in shelving, and crisp white trim throughout
All trim is installed — door casings, base molding, window trim, built-ins, and any custom millwork that's part of the design. Then paint goes on, bringing the color and character you selected during the design phase.
Flooring goes in last, protecting it from the trades that came before. We work with a wide range of flooring materials suited for basement applications:
- Luxury vinyl plank (LVP) — most popular for its durability, fully waterproof construction, and realistic hardwood appearance
- Engineered hardwood — for clients who want the warmth of real wood with better moisture tolerance than solid hardwood
- Tile — for bathrooms, bar areas, and utility spaces
- Rubber flooring — the right choice for home gym applications
- Carpet — for media rooms and bedrooms where comfort underfoot is the priority
Phase 10: Final Finishes, Fixtures & Inspection
The final phase brings everything together. Light fixtures, outlet and switch covers, plumbing trim (faucets, shower fixtures, toilet), cabinet hardware, mirrors, and all the other finish elements are installed. We coordinate the final municipal inspection and sign-off on all permitted work.
Then we do our own final walkthrough with you — going through every detail together so that you're completely satisfied before we consider a project complete.
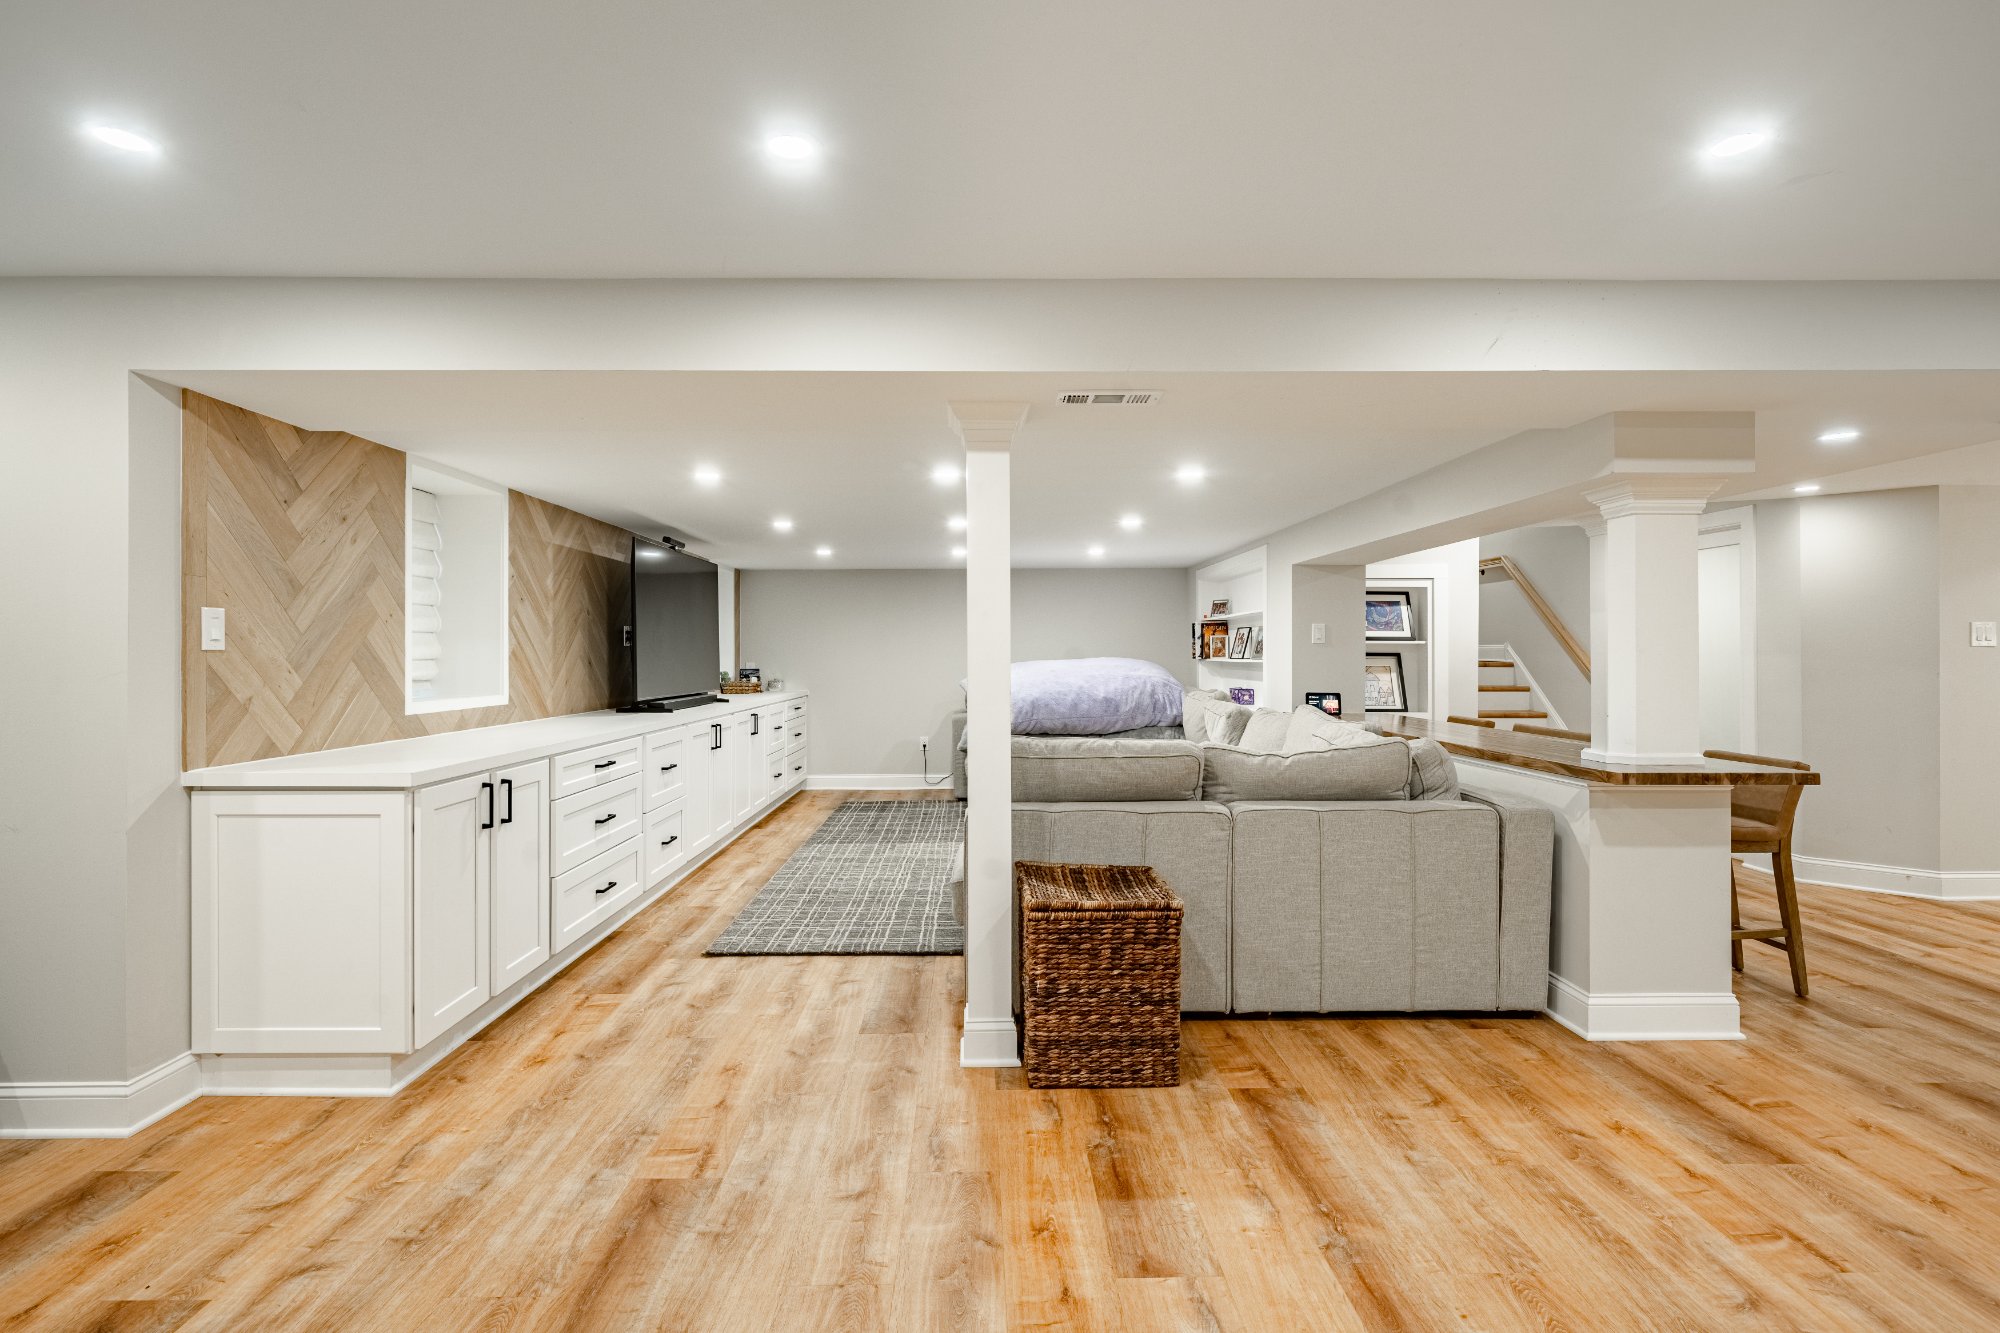
What's Possible: Recent Craftsworth Projects in Chester County
Every space below started as an unfinished or outdated basement. These are real projects, built by our team, for homeowners right here in Chester County.
Griffith Lane — Full Entertainment Suite with Bar, Game Room & Full Bath
Griffith Lane bar — custom cabinetry, natural stone backsplash, exposed beam wrap over structural steel, full-size refrigerator
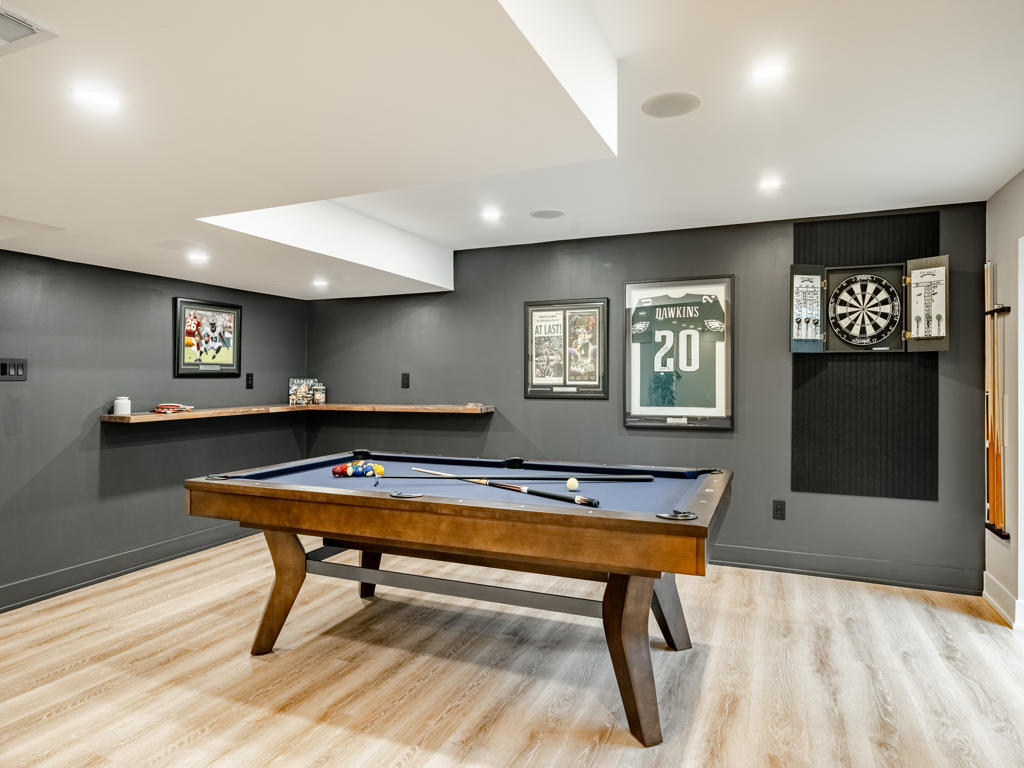
Griffith Lane game room — pool table, dart board nook, dark accent wall, recessed lighting, in-ceiling speakers
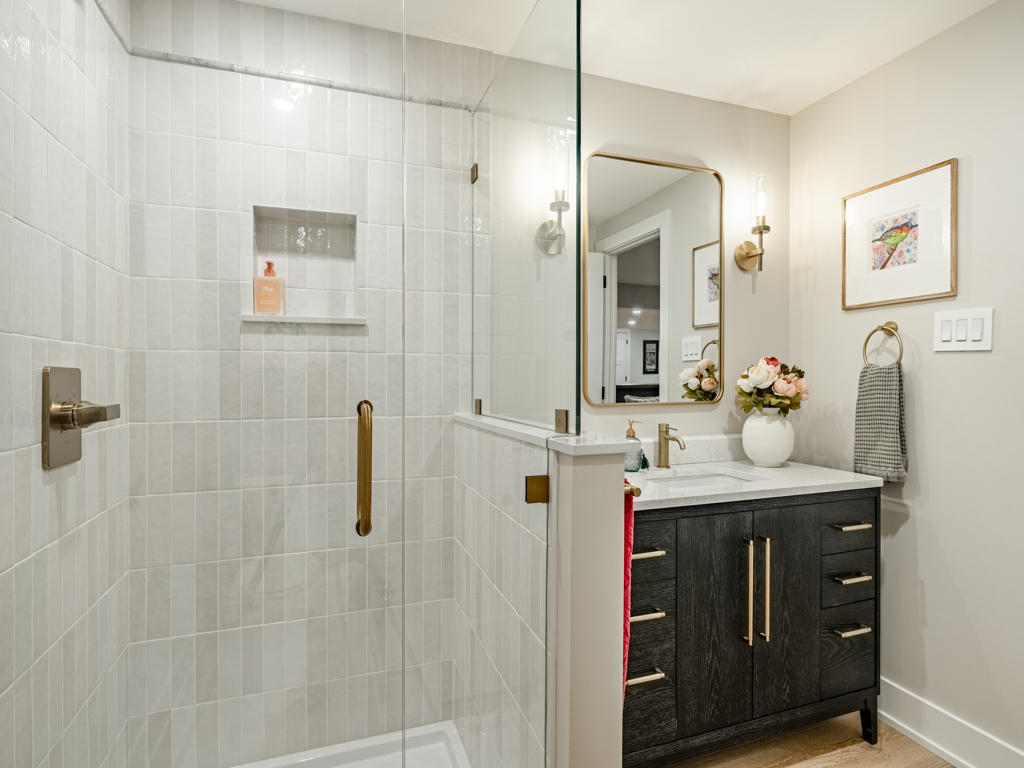
Griffith Lane full bathroom — frameless glass shower, vertical tile, brushed gold hardware throughout
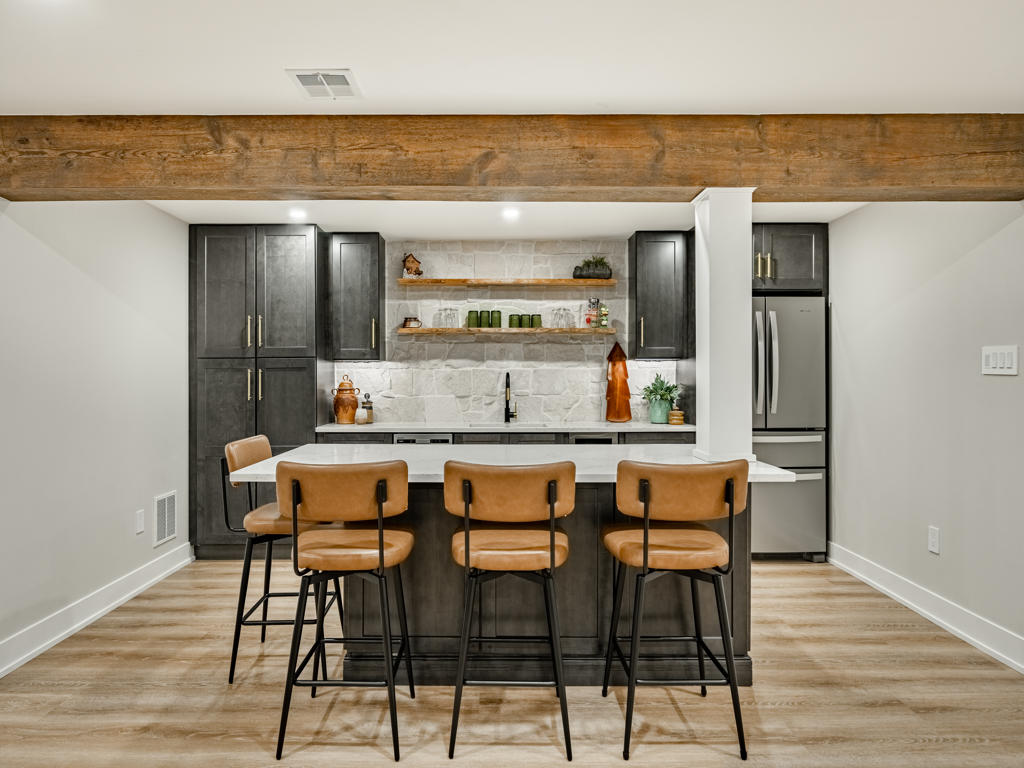
Saratoga Drive — Open Living Space with Movie Bar & Home Gym
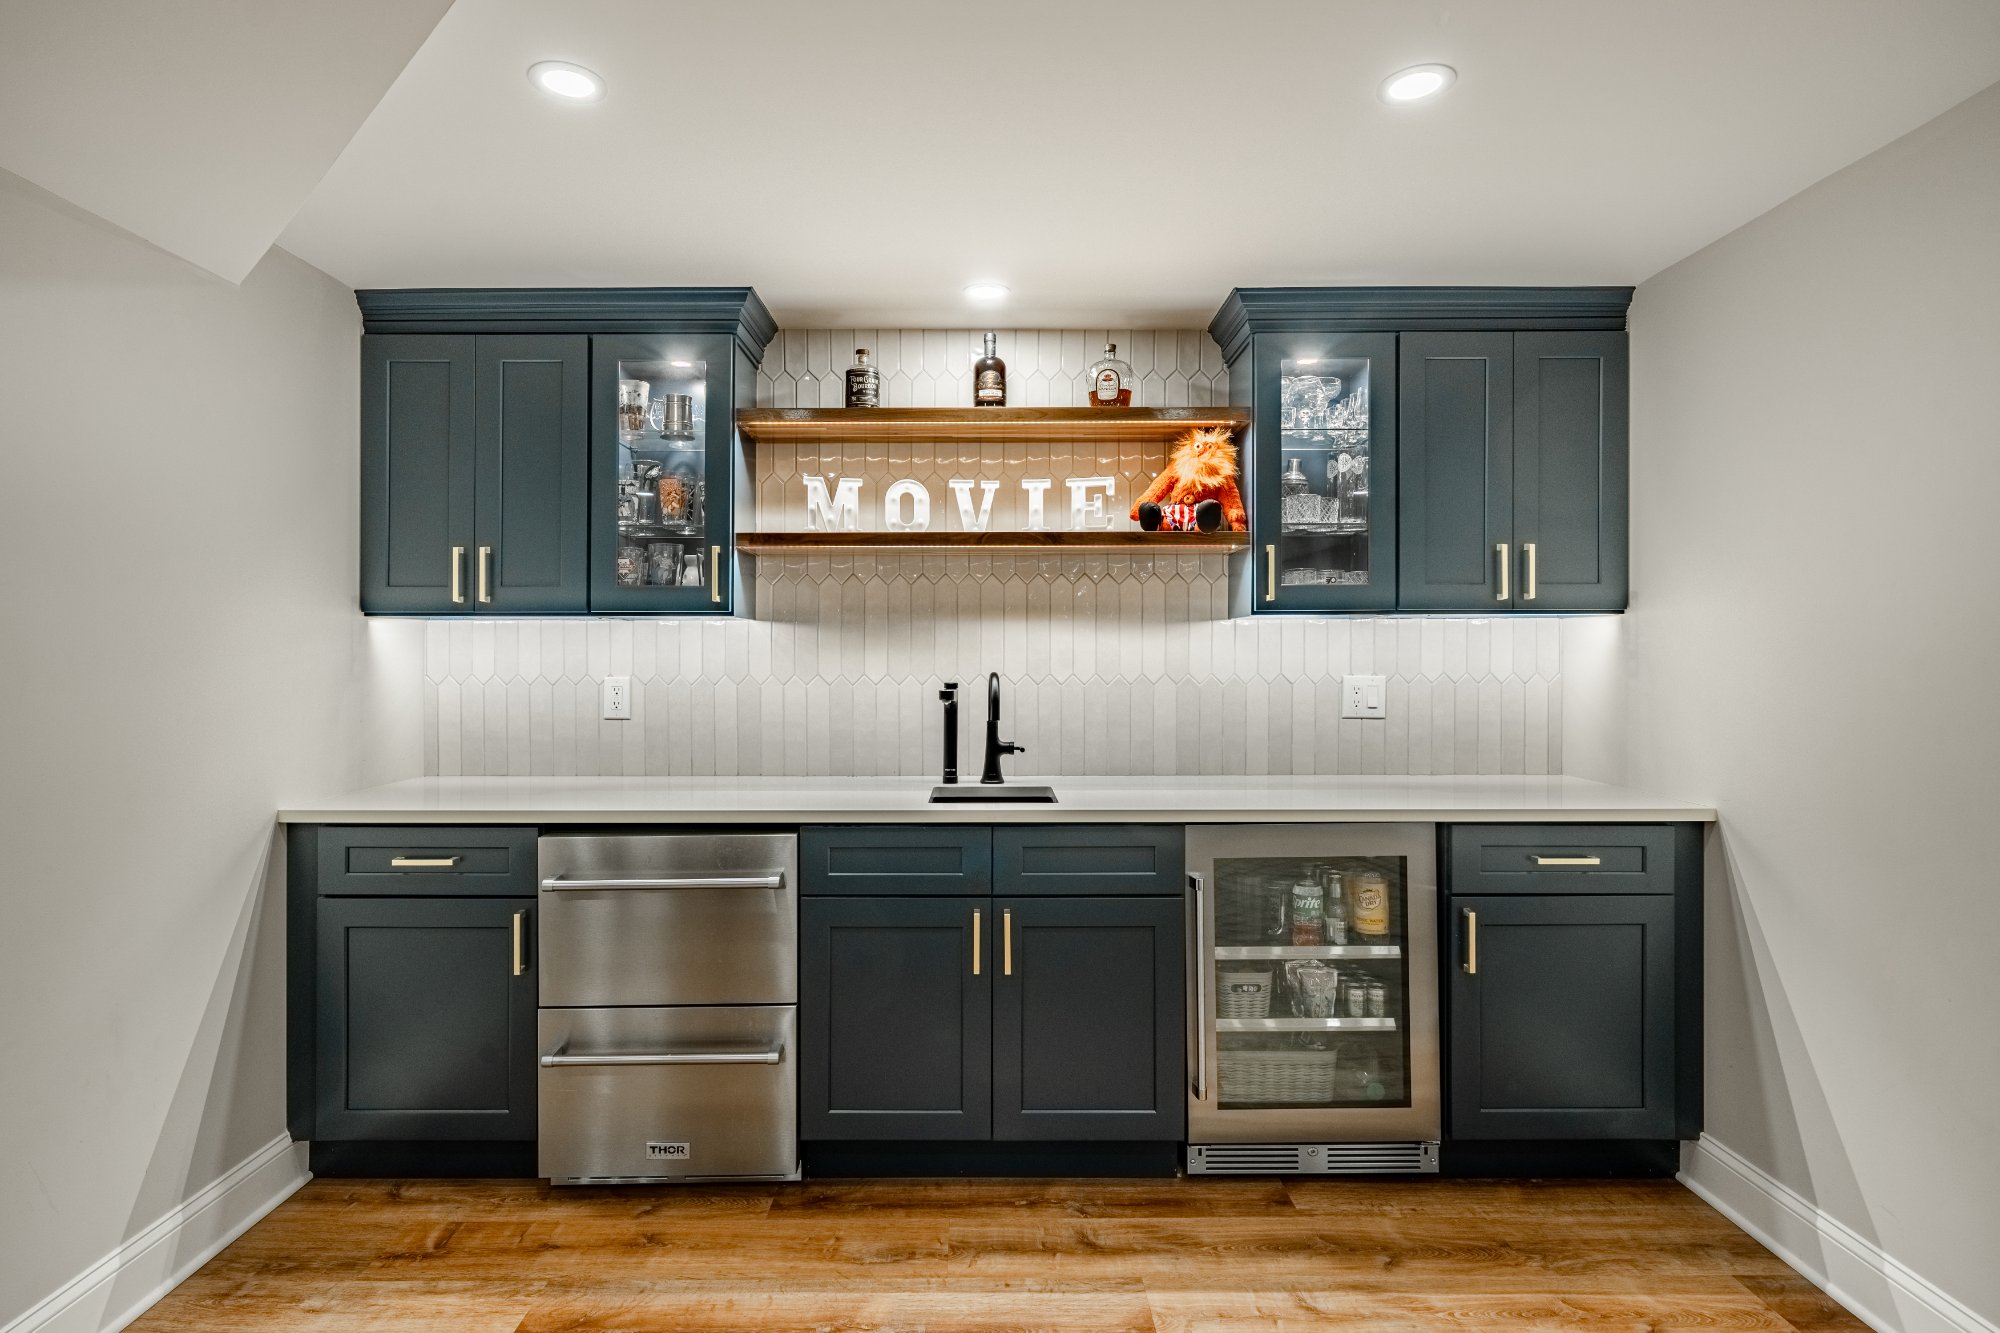
Saratoga Drive movie bar — custom teal cabinetry, geometric tile, floating wood shelf, Thor drawer refrigerator, and beverage cooler
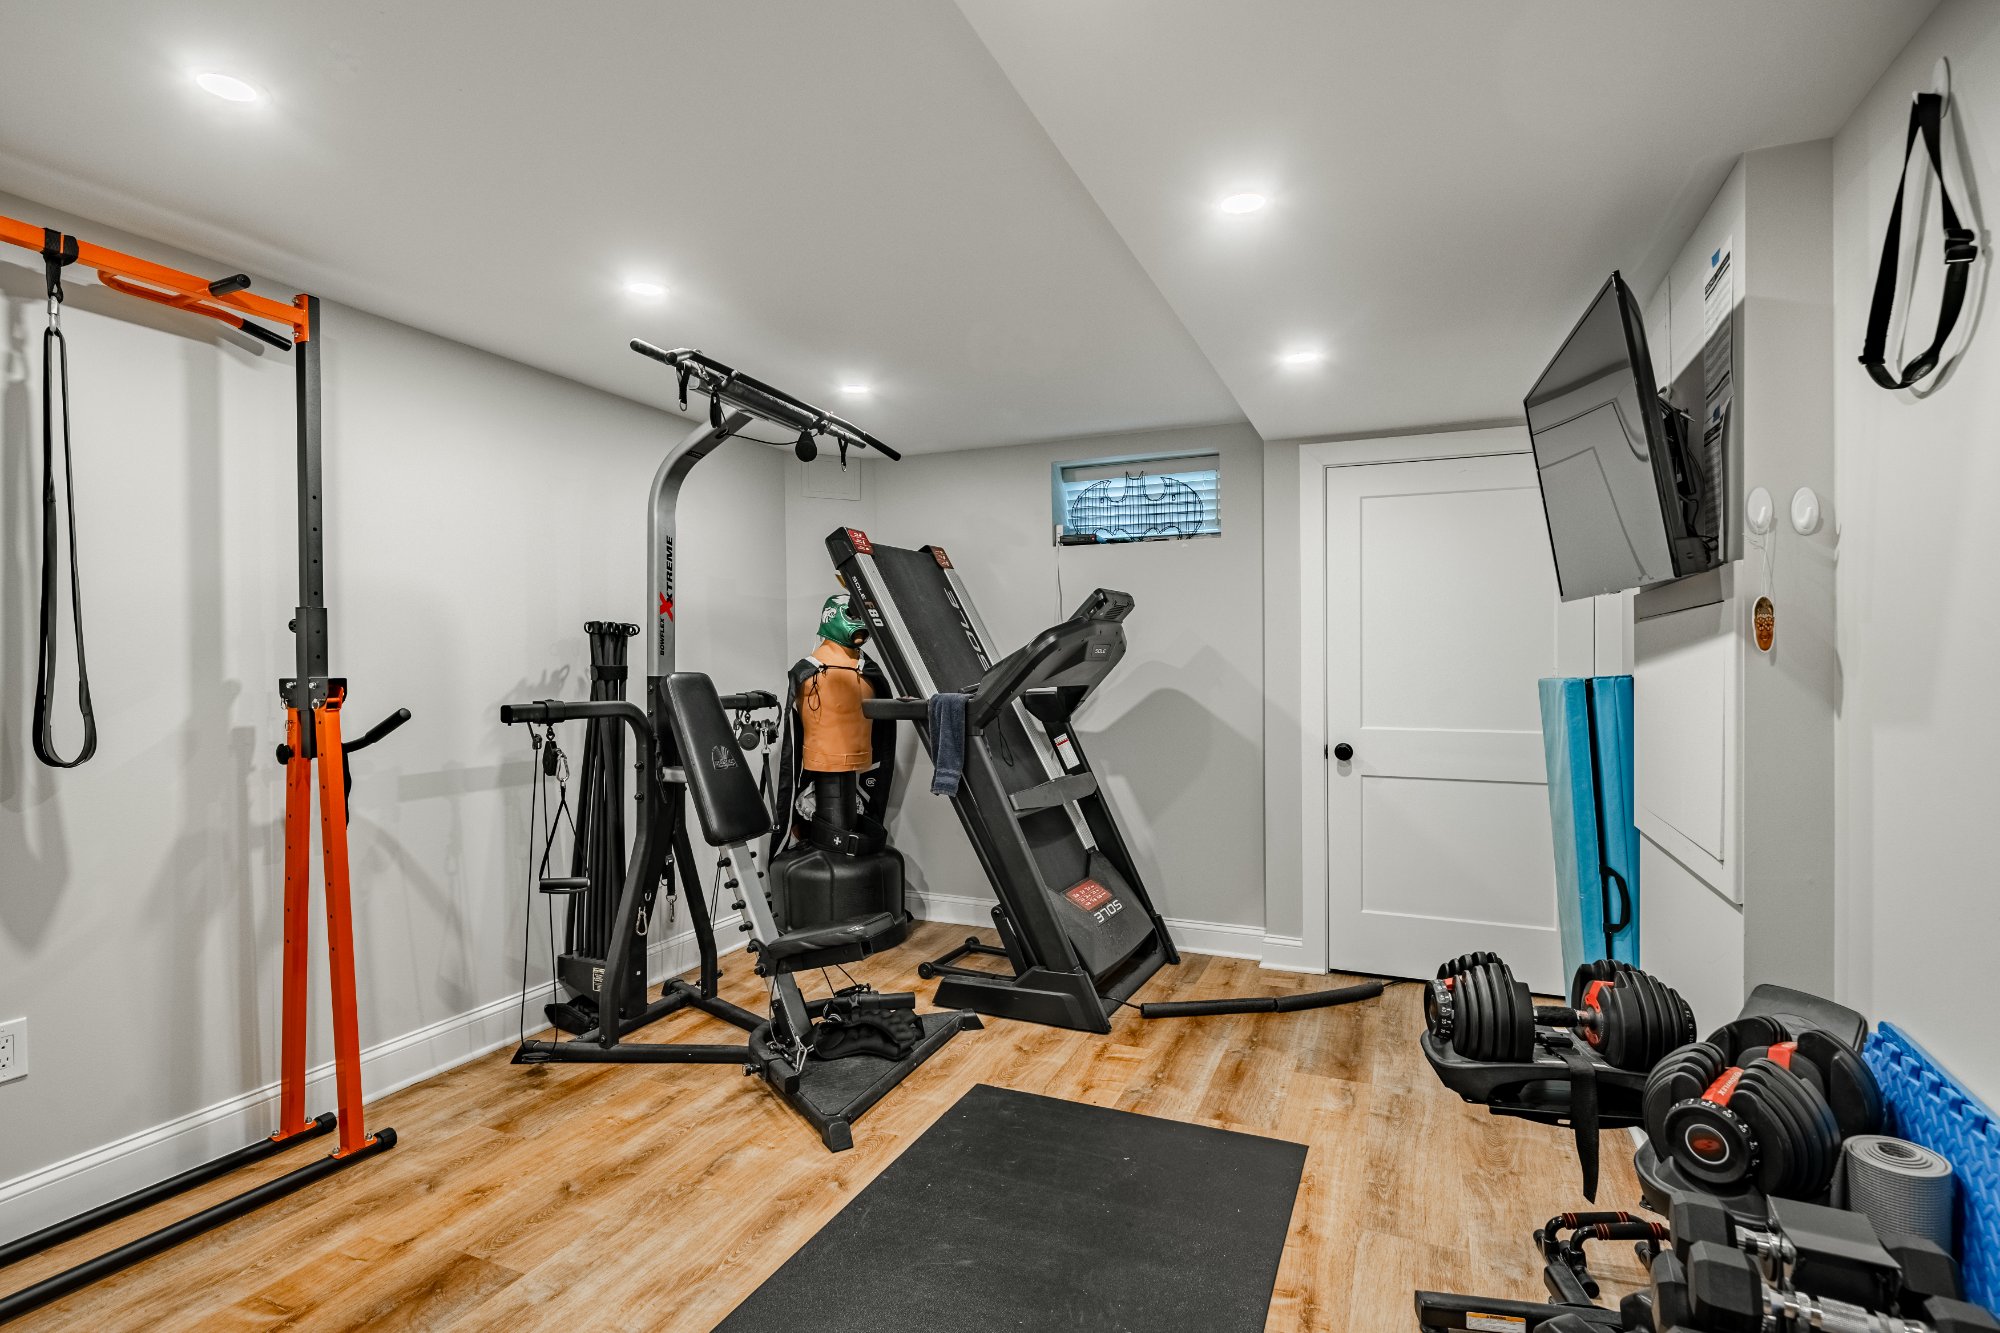
Saratoga Drive home gym — wall-mounted TV, LVP flooring, dedicated recessed lighting
Plymouth Road — Clean Modern Basement with Wet Bar
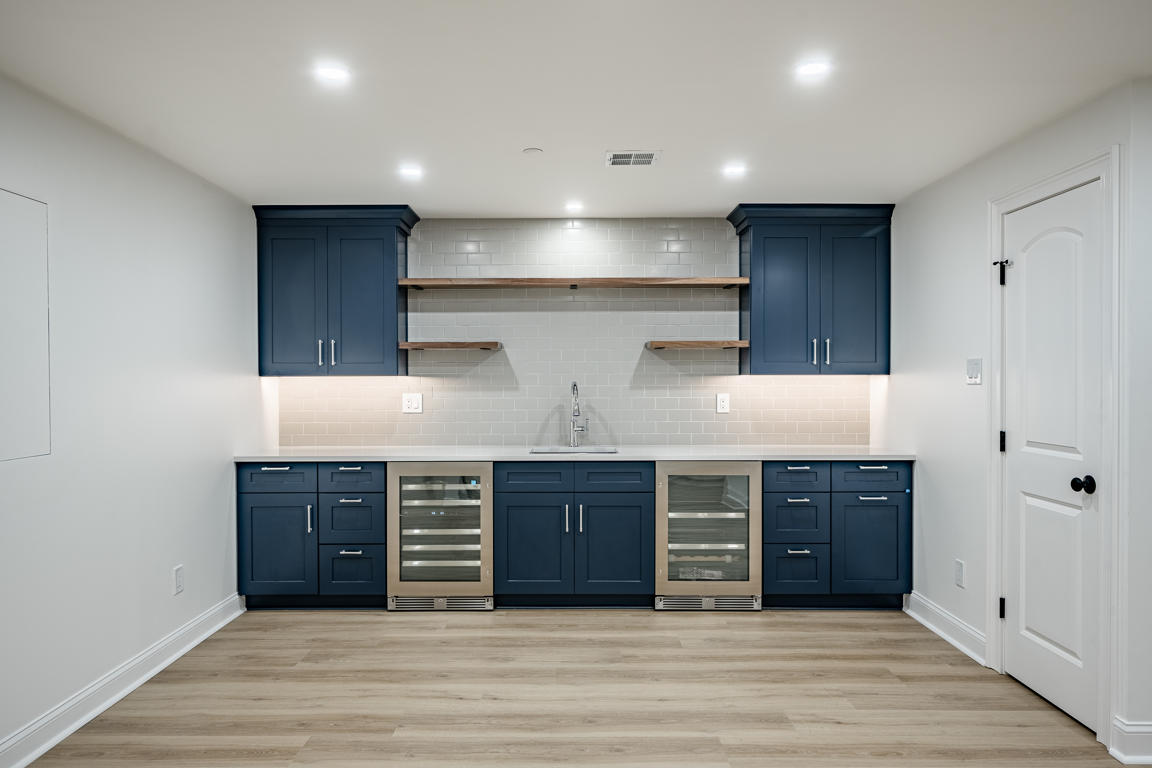
Plymouth Road wet bar — navy shaker cabinetry, subway tile, floating wood shelves, dual wine refrigerators, and quartz counters
Carriage Path — Media Room & Home Gym
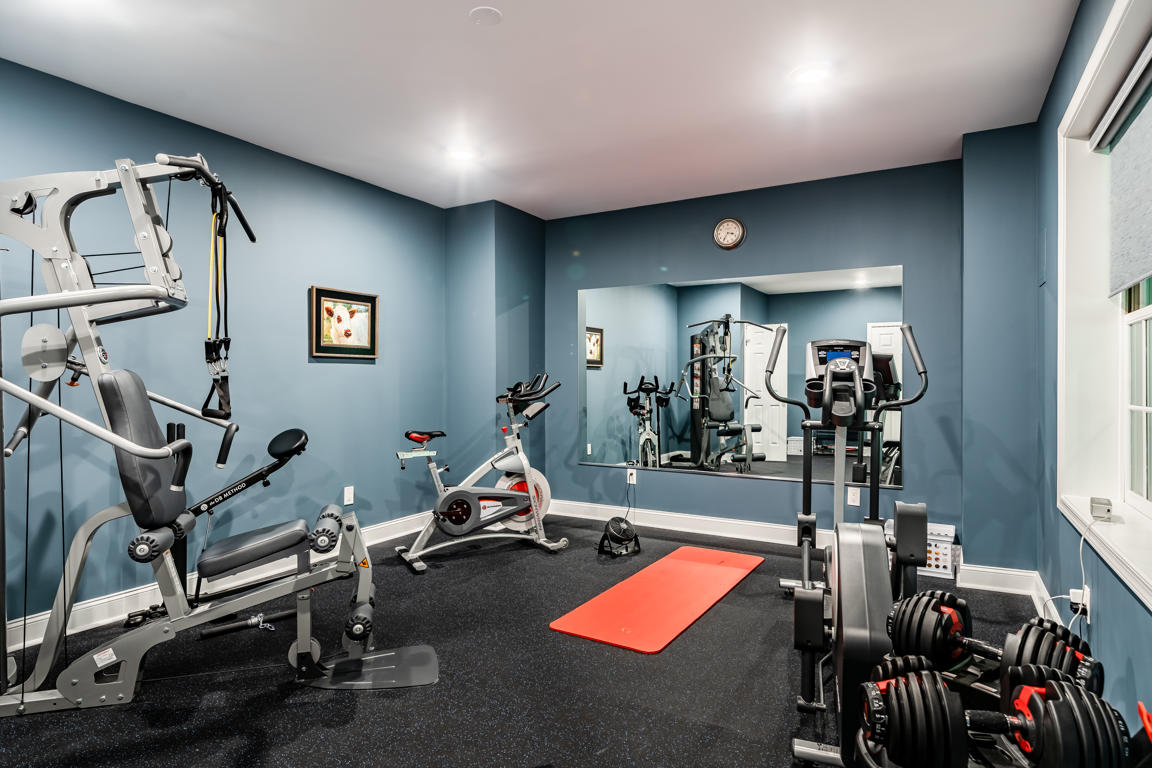
Carriage Path home gym — rubber flooring, mirrored wall, and dedicated recessed lighting
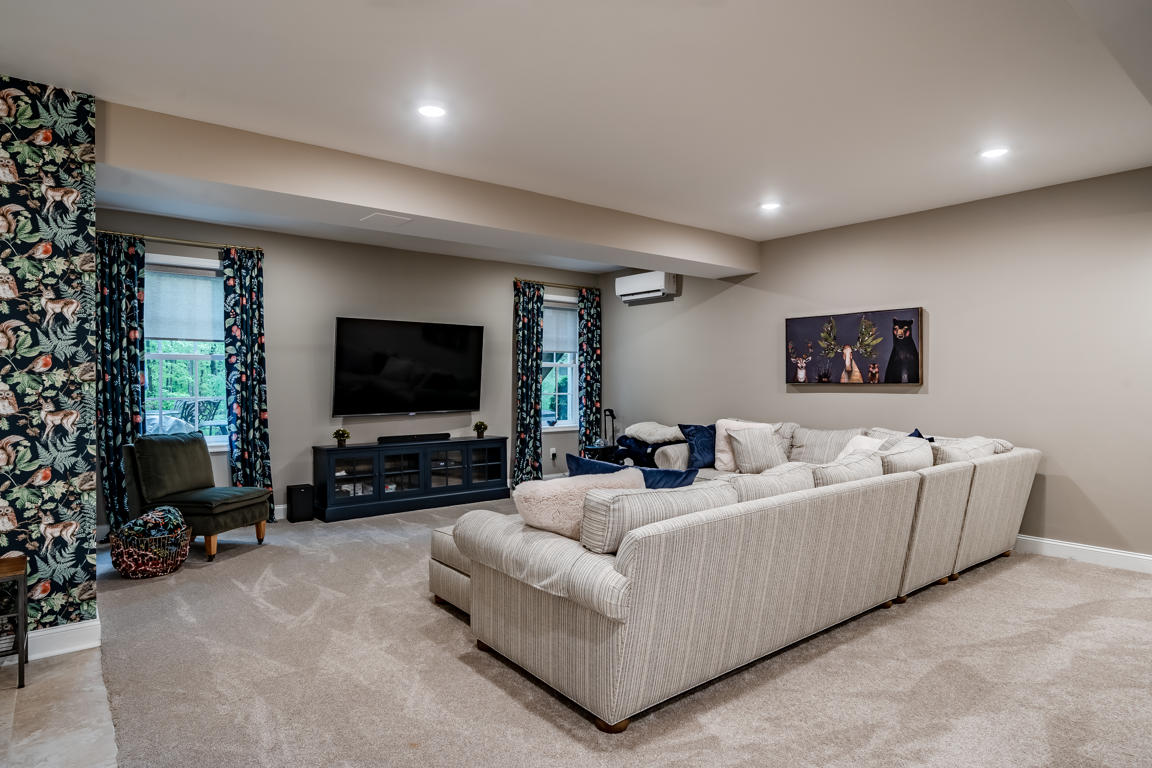
Carriage Path media room — bold accent wallpaper, large-format TV, mini-split, and custom drapery
Ready to Get Started?
A well-executed basement remodel adds hundreds of square feet of functional, beautiful living space to your home. Done right — with proper waterproofing assessment, fully permitted work, quality materials, and real craftsmanship — it's a space your family will use and enjoy for decades.
At Craftsworth Construction, we've built a process specifically designed to make this as smooth and stress-free as possible for Chester County homeowners. If you're thinking about finishing your basement, we'd love to come take a look.
Contact us today to schedule your free consultation.
Craftsworth Construction serves Chester County and surrounding communities in southeastern Pennsylvania, including West Chester, Malvern, Downingtown, Phoenixville, Coatesville, Kennett Square, Berwyn, Wayne, and beyond.